
Macro photography has evolved into a vast and diverse genre within the world of photography, thanks to the incredible capabilities of modern cameras. Whether you’re using a smartphone or a professional-grade camera, capturing stunning macro shots has become as simple as pressing a button or two. However, achieving the desired results in macro photography can sometimes be challenging.
To truly elevate your macro photography skills, it’s essential to understand the fundamentals of this art form and how it is accomplished. So let’s delve into the fascinating realm of macro photography and explore its intricacies.
At its core, macro photography is a distinctive form of capturing images that involves photographing small objects in a way that they appear life-sized or even larger in the final photograph. It grants us the opportunity to experience an up-close view of objects that we typically encounter from a distance with our naked eyes. The usual subjects that lend themselves beautifully to macro photography include delicate flowers and tiny insects. Additionally, this specialized technique allows for the exploration of intricate details in jewelry and various inanimate objects. Macro photography has found its place across numerous disciplines within the broader field of photography. Whether it’s travel, portraiture, action, or event photography, macro shots find their application in both film and digital mediums.
The true essence of a macro shot lies in its level of magnification. The ideal magnification ratio for a macro photograph is 1:1, where an object measuring one inch is projected onto the camera sensor at the same size as one inch. This means that the captured image replicates the object’s actual size. If the same one-inch object were projected at half life-size, it would occupy only half an inch on the camera sensor, resulting in a 1:2 magnification ratio. However, any photographs that achieves a magnification ratio of 1:1 or higher is considered a genuine macro shot.
Mastering macro photography requires meticulous attention to detail, patience, and a keen eye for composition. By exploring the intricacies of this captivating art form, you can unlock a world that is often hidden from our everyday perception, revealing extraordinary beauty in the smallest of subjects.
10 Common Beginner Mistakes in Macro Photography
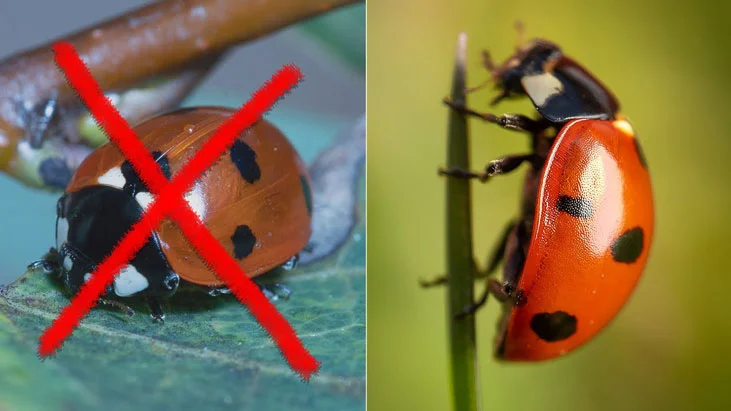
1. Thinking macro and close-up are the same thing
Although the terms close-up and macro photography are often used interchangeably, in reality only a reproduction ratio of 1:1, or a magnification of 1x (life-size), can be classed as a macro; anything less than that is close-up.
For the most part, this distinction is inconsequential, but when it comes to buying a lens it’s important to note that some manufacturers describe their lenses as ‘macro’ when, in fact, they are incapable of achieving 1:1 magnification and should really be described as ‘close-up’.
2. Believing you have to travel to find picture opportunities
One of the great joys of close-up and macro photography is that you don’t have to travel far to find suitable subject matter. When approached with an air of curiosity, everyday objects can become a photogenic mix of abstract shapes, colors, and forms.
What’s more, garden spaces, regardless of their size, are bursting with life, waiting to be captured by the camera. In fact, while you’re still learning the ropes, practicing on subjects close to home is preferable.
3. Failing to find order in the chaos
Some of the best macro and close-up images are a result of the photographer reducing a scene down to its core elements. When faced with a complex environment it helps to look for recurring patterns, shapes, and lines.
It can take time to find order in chaos, but if you slow down and tune into what’s in front of you the core elements will eventually make themselves known. Once they have, it’s your job to emphasize them using patience, perseverance, and solid technique.
4. Forgetting about the ‘rules’ of composition
With so many technical decisions to make, it’s easy to forget that the ‘rules’ of composition that apply to general photography also apply to macro and close-up work. While lead-in lines might not take the form of fences and rivers, you can use petal edges, stems, and even a spider’s legs to lead the viewer’s eye into and around the frame. What’s more, the rule of thirds, the idea of using odd numbers of elements, and the KISS (Keep It Simple Stupid) principle still applies.
5. Thinking you have to buy an expensive macro lens
While it may be true that nothing beats the optical performance of a dedicated macro lens, you can’t escape the fact that these optics are a financial investment. Before you commit, you might like to try a close-up attachment lens, extension tubes, reversing rings, or a teleconverter.
If you’re still not sure that macro is for you, then consider hiring a lens for a few days. Once you’re convinced (and I’m confident you will be!), look at third-party lenses from the likes of Sigma, Tamron, and Laowa.
6. Not doing your research
Whether you’re shooting a plant, a wave, or an insect, a little research can go a long way. Learning when an insect sleeps, for example, will allow you to visit when it’s less mobile and thus easier to photograph. Similarly, knowing when a plant will bloom will enable you to arrive on location before the petals have been torn or nibbled by insects.
7. Getting snap happy when faced with a picture opportunity
When you spot a once-in-a-lifetime opportunity it’s easy to panic and start firing off frames without thinking. Unfortunately, this rarely leads to prize-winning pictures. For many photographers, a shoot begins with pre-visualization – having an image in your mind’s eye.
By scribbling ideas in a notebook or sketchbook you always have a starting point. But it’s important to remain flexible and be ready to adapt if conditions aren’t as you imagined.
8. Overlooking common, or overly familiar, subjects
It’s often said that a weed is a flower in the wrong place, and it’s certainly true that some of the UK’s most beautiful wildflowers – think dandelion, herb Robert, and Scarlet pimpernel – are often yanked out of patios or doused with weed killer.
It’s tempting to focus on ‘showier’ subjects such as orchids and roses, but if you look at familiar subjects with fresh eyes you will be rewarded with pictures that nobody else has seen.
9. Forgetting about ‘traveling’ space
Most photographers know that when you include a moving animal in your composition you need to allow space for it to ‘travel’ into. If you position it too close to the edge of the frame then the viewer is more likely to think of it as trapped than flying, jumping, or running. The same can be said for eyes – if an animal is looking to the left, for example, then give it space to gaze into. Plants, also, need room to grow into.
10. Ignoring ethics
Chilling, killing, or disabling an animal for the sake of a picture is never acceptable. Animals will often stay in one place when they’re eating, sleeping, or mating so if you do your research, you’ll know the best time to approach them.
If you’re still struggling, consider photographing discarded animal skins, or abandoned cases, or try looking for dead insects on window ledges, car windscreens, and lights. When it comes to plants, take care not to squash vegetation and never pick or remove wildflowers.
Top 10 Expert Tips for Macro Photography
Macro Photography Tip #1: Get a good macro lens
While today’s cameras offer a macro mode in the menu or analog settings, they don’t offer as much as 1:1 magnification. If you want magazine or gallery-quality macro pictures, you’ll need to purchase a dedicated macro lens for your camera. There’s a wide array of macro lenses on the market that offers 1:1 magnification and above for your camera. You might be taken aback by some of their price tags, but they’re definitely worth the investment for greater-quality macro shots.
Enthusiasts have a few great options, including extension tubes and reversing lenses. A standard camera lens with extension tubes on it offers some magnification, while a reversed lens and extension tubes deliver greater magnification.
But if you’re new to macro photography, a dedicated lens for your camera is the most convenient and versatile option that you have. A lot of popular macro lenses have focal lengths between 90 to 105mm and 1:1 magnification. Other lenses feature shorter focal lengths with shorter working distances. So they might need you to come closer to your subject as you shoot.
Bonus tip: If you plan on shooting flat objects such as coins, or stamps, use a “flat-field” macro lens to ensure edge-to-edge sharpness.
Macro Photography Tip #2: Choose a suitable subject
Contrary to popular belief, not everything will make for a good macro subject. There are certain subjects that are indiscernible when viewed close up and without context—and if your viewer can’t understand what they’re looking at when they see your macro shot, how can they appreciate it? But of course, this is all a question of preference and aesthetics. If the subject you photographed appears confusing in macro but is still aesthetically pleasing to the eyes, then it definitely qualifies as a suitable subject.
Common subjects include small insects, butterflies, raindrops, and small objects such as miniature dolls, jewelry, and household items. Inanimate objects are fairly easy to photograph as they don’t move, but insects and bugs can be a lot more challenging. One key tip for photographing them is to shoot from a safe distance to avoid scaring them off.
Macro Photography Tip #3: Pick the best location and weather
Small bugs and insects are among the most interesting subjects in macro lens photography, as well as flowers and plants. Locations that have plenty of flowers and plants will give you many opportunities for macro shots. As for bugs and insects, these creatures are more active in warm outdoor temperatures. This means you should go out and shoot them at around 62°F (17°C) or warmer.
It’s also great to capture insects in colder weather since they stay still in their habitat. A few macro enthusiasts travel to certain places early in the morning during summer so they can see and capture sleeping insects. You’ll also get softer light with overcast weather, making it a much better climate than sunny conditions to capture macro images.
Also, learn bug behavior. There are bugs that fly away when you come close to them, adapt to your presence within a few minutes, or completely ignore you. Shooting plenty of macro images is great for learning bug behavior: You’ll easily predict your subject’s next move when you do.
When photographing extremely thin objects like flowers or leaves, bright sunlight can be a difficult aspect to combat, as it can “burn” through your subject and cause hot spots, or parts of your image to be overexposed. Try shooting during cloudy days, utilizing shade, or creating shade as needed.
Macro Photography Tip #4: Get stable with a tripod
You can control composition and eliminate the variable of a moving camera very simply: don’t move it. Put it on a tripod, a bean bag, or a mini-pod so it goes nowhere.
Whether you choose to shoot with a tripod, a monopod, or simply are careful to position yourself in an “anchored” position, you should be conscious to steady your camera when shooting extremely close-up. The smallest unintentional shifts in framing can change an entire shot.
Macro Photography Tip #5: Use a longer focal length for living subjects
Speaking of lenses, you may want to go for those that offer longer focal lengths, depending on your subject of choice. This allows you to “digitally” move in closer (without actually having to move closer) when photographing insects and objects close-up without disturbing them or disrupting their natural environment. The best focal length for these types of situations should be anything above 90mm, such as the Tokina atx-i 100mm F/2.8 FF Macro Lens.
Macro Photography Tip #6: Incorporate assistive accessories
Even without a dedicated macro lens, you can achieve good macro shots with assistive accessories that can be incorporated into your macro kit. There’s what they call a diopter, which is also known as the “poor man’s macro lens.” It’s basically a close-up filter or magnifying glass that is screwed onto your regular lens or to any bridge or compact camera to achieve macro magnification without having to purchase a true macro lens.
Bellows or tubes are the accordion-like, expandable part of a camera that helps achieve ultra-tight close-ups of your subject. You can also get lens adapters that allow you to reverse your lens and manually control the aperture.
Instead of using a tripod, which can be quite restrictive for the photographer, you can use “third hand” devices (anything you can create or devise with the available tools you have to create a literal “third hand”) for holding and supporting your subjects steadily and against your desired background.
Macro Photography Tip #7: Customize your background
Shooting inanimate objects is fairly easy as you can have complete control over the positioning, lighting, and even your background. Simply place it against your desired background, depending on your composition, and make sure they don’t clash with each other. Many photographers prefer to keep it simple by positioning their subject in front of a contrasting background that’s located farther away from the subject, so it comes off as a beautiful background blur.
If you’re spontaneously shooting outdoors, you may not have that much control over your background. However, you can change your perspective or maybe use that “third hand” support for positioning your object, such as a leaf or flower, to face you from another angle.
Remember that the eye naturally goes to the brightest spot in a photo, so if you are shooting in mixed light, be aware of what’s in the background. You may need to change your point of view, get closer and fill the frame with your subject, or bring a sheet of plain paper or an 8×10-inch print of generic, highlight-free foliage to hold behind your subject. You can also control background clutter by shooting at wider apertures, which reduces background focus, or using a ring light, which throws most backgrounds into darkness.
Macro Photography Tip #8: Pay attention to your depth of field
Most people will advise you to use smaller apertures (a larger f-stop number) as this helps increase your depth of field and ensure that the important parts of your subject are in sharp focus. However, the problem with using a smaller aperture is that the reduced and diffracted light can greatly affect the sharpness of your image. On the other hand, if you use too large of an aperture, you end up with less depth of field. This means that some parts of your subject may end up blurred out as well.
One of the hardest parts of doing macro photography is achieving the right balance between desired sharpness and depth of field. If you are able to shoot from a perspective or angle that allows you to fit the most important or interesting parts of your subject on a single plane of focus, which ensures that your subject remains sharp while still maintaining beautiful background bokeh, then it’s all a matter of finding the largest aperture that will allow you to do that without leaving your subject blurred out in certain parts.
Potential fix: Crop your image
Or if you don’t mind cropping your image, you can also decrease your magnification and use a smaller aperture to ensure that all parts of your subject are sharp, then simply crop the photo to make your subject appear more magnified. However, a challenge in using smaller apertures is that it restricts more light from coming into the lens, which means you’ll often need slower shutter speeds to be able to properly expose your shot. Depending on the photographer, the solution can be using a tripod for a steadier shot or using flash to add more light to the scene.
Potential fix: Try focus stacking
Another recommended solution to the problem of balancing depth of field and sharpness is focus stacking, which is a built-in feature in a select number of cameras. If you don’t have this feature, it can also be accomplished in Photoshop.
Macro Photography Tip #9: Go Manual
While the automatic features in today’s cameras often take the guesswork out of photography, when it comes to focusing on close-ups, you’d be better off using the manual override. That’s because the autofocus feature works best when there’s a clear area for the lens to lock in on. But that’s usually not the case when we shoot close-ups with our macro lens. In fact, your lens will go bananas trying to find something to lock in on. By working with manual focus, you can decide what you want to focus on and lock into it when you are satisfied with what you see through your lens.
Be especially careful when the element you are focusing on is at the center of your image. Remember that with a narrow depth of field, everything toward the edges of the frame will tend to be out of focus. If you have a bright, blurred area at the lower edge closest to your lens, it could dominate your composition and draw the viewer’s eye away from your actual focal point. If you see a bright area along the lower edge, recompose or focus on something in the bright area and create a composition around that.
Macro Photography Tip #10: Create better lighting
A key component in photography is light, and macro photographers obviously greatly benefit from having good lighting conditions. Aside from using it to artistically improve your shots, you can add light to support your exposure settings. You can do this when the subject is still too dark despite having a wide-open aperture.
Many macro photographers would advise beginners to use a ring flash to enable the use of smaller apertures, as well as faster shutter speeds for handheld shooting and moving objects. Ring flashes or twin flashes offer good 3D lighting that is not as flat as built-in pop-up flashes.
Macro photography makes capturing enough light rather challenging. Maybe it’s because you’re using high levels of magnification. Or perhaps it’s because the close focus on your camera magnifies motion blur and blur from camera shake. Alternatively, you’re blocking more natural light when you come closer to your subject. Using Flash can help you solve any of these issues. Flash fills in your preferred amount of light and quickly freezes motion.
But camera flashes can also give you harsh lighting and glaring specular reflections when you use them for macro shots. A diffuser will prove useful in these situations. It lets you extend the flash area and produce a much softer light.
")


